No more eraser smeared torn up exposure sheets. Making a spiffy electronic exposure sheet template is a piece of cake...
I have a confession to make: for a few years, I never used dope sheets (otherwise known as exposure sheets) for animation. I only started after I found myself in a camera room at 3:00 AM, wired on chocolate-covered espresso beans and Jolt cola, trying to make sense of the scribbled notes that passed for my camera instructions.
When I started using dope sheets, I discovered that I didn't like them much, mainly because they couldn't withstand my improvisational nature: during the planning stages, I kept erasing and rewriting until the sheets were only held together by a few fibers. And when I really went nuts (or just wasn't paying attention), I'd run out of usable sheets. Is it any wonder I started creating my dope sheets digitally? Of course, in those days I used Lotus 1-2-3 for DOS for the task; I could only dream of making the spiffy dope sheet template we're going to put together in this installment.
What you need:
A. A spreadsheet program. For my examples, I'll be using Excel 97 for Windows.
Before doing anything, we'll need to figure out the kind of paper we're printing on, and how much space we've got for our printout. While we're at it, we'll enter the production information in the header, so that it will print on every page of the finished sheets.
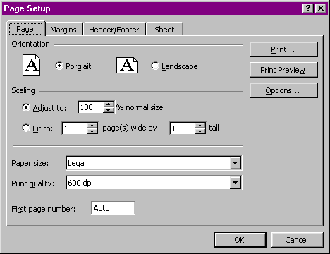
1. From the menu, select File, Page Setup. Click on the Page tab.
2. Select the paper size from the Paper size combo box. We'll use Legal for this example.
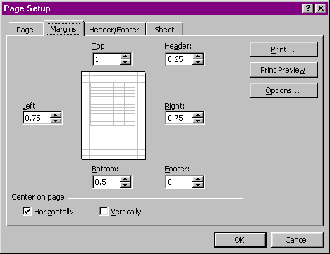
3. Click on the Margins tab. Set the top margin to 1", the left and right margins to .75", and the bottom margin to .5". Set the header to .25", and footer to 0".
4. Check the Horizontally box in the "Center on page" section.
5. Click on the Header/Footer tab.
6. Click Custom Header.
7. In the Left section box, enter Scene:, press ENTER, then enter Sequence:. You'll be able to enter the sequence and scene numbers here later.
8. In the Center section box, enter the production's title.
9. In the Right section box, enter Page, press the spacebar, and click on the page number button.
10. Click OK.
The next step is to enter headings for the columns. You can do this in any order you please, but this is how I do mine:
Column A: DialogueColumn B: CameraColumn C: BGColumn D: Level 1Column E: Level 2Column F: Level 3Column G: FrameColumn H: Action
Columns D through F are for your cel levels. You can put as many or as few of these columns as you need. I also like to bold the headings, but that's purely personal preference.
One more flourish, and our template's finished. We're going to create borders for our cells to make a grid.
1. Select the columns above the headings. Click on the A in the column heading, and drag the mouse pointer over to H (or wherever your last column is).
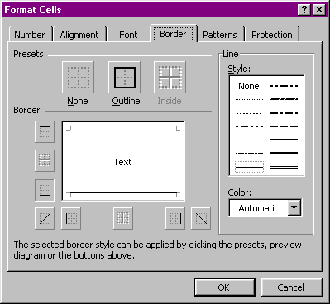
2. From the menu, select Format, Cells. Click on the Borders tab.
3. Pick one of the light line styles, then click the Inside button. Click OK.
4. Set off your headings. Highlight the first row (where you typed the heading names), then select Format, Cells from the menu. Click on the Borders tab.
5. Pick one of the thicker line styles (but not the thickest), then click the button for the bottom of the cell. Click OK.
6. Figure out how many frames will make up a second. We'll use 30 here, for video.
7. Count of an equivalent number of blank cells under the headings, and highlight the last row you land on. (A shortcut: add 1 to the number of frames per second to tell you the row number you need.)
8. From the menu, select Format, Cells. Click on the Borders tab.
9. Pick the thickest line style, then click the button for the bottom of the cell. Click OK.
10. Decide on your subdivisions within each second. For our example, we'll divide each second into thirds (ten frames).
11. Highlight the last row in a subdivision, and create a border on the bottom using the second-thickest line style. Repeat for any other subdivisions.
Rather than repeat this process for every second, we'll just use a little cut and paste.
1. Highlight the first second's rows. In our example, that's rows 2 through 31.
2. Click Copy.
3. Click in the cell underneath the selected area, in column A (A32, in our example). Click Paste.
4. Click underneath the newly selected area, in column A. Click Paste.
Now it's just a matter of making things fit. First, we need to see how much room we've got.
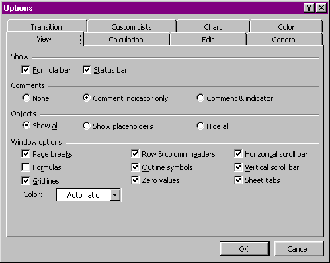
1. From the menu, select Tools, Options. Click on the View tab.
2. Check the Page Breaks box.
3. Click OK. Dotted lines signifying page borders will appear in the spreadsheet.
No we'll make sure we can fit a whole number of seconds to one page. In our example, one page fits 71 frames, nearly 2.5 seconds. Depending on how much you're willing to squint, you can squeeze three seconds on a page or use larger cells to fit two seconds. Let's opt for 3 seconds.
1. Click in any cell in the last row that you want to fit to the page.
2. From the menu, select File, Page Setup. Click on the Page tab.
3. In the Adjust to box in the "Scaling" section, choose a percentage which you think might be suitable.
4. Click on Print Preview. If it fits perfectly, click on Close. Otherwise, click on Setup and work back and forth until you've settled on the right percentage.
Now you can adjust the column widths to your liking. You'll probably want to expand the Camera and Action columns, so go to it: put your mouse pointer between two column headings, and it will turn into a double-headed arrow. Drag the arrow to resize the column on the right side of the arrow. Just make sure you don't cross the page border.
We're almost finished! Now all we have to do is set Excel to repeat the column headings on every page.
1. From the menu, select File, Page Setup. Click on the Sheet tab.
2. In the Rows to repeat at top box, type A1. Click OK.
This repeats the column headings on every printed page. To keep the column headings visible on the screen when you're working in Excel:
1. Click in cell A2.
2. From the menu, select Window, Freeze Panes.
Your dope sheet is finished! Before you sit back to admire it, save it as a template. In Excel, you would do this by selecting File, Save As from the menu, and selecting Template as the file type. Excel will automatically place the template in Microsoft Office's Templates directory. If you're using a program that doesn't support templates, then just save it as a regular spreadsheet.
If you're a pencil and paper kind of person, you can print out as many of these as you like and fill them in by hand. However, you can also use Excel to fill out your dope sheet neatly and colorfully. Tune in next month to find out how.
Emru Townsend writes about animation and cinema at every opportunity. He resides at emru@pobox.com, and you can visit his website at www.cam.org/~emru.


