Continuing our monthly look at 3D environments, Stash magazines Stephen Price helped VFXWorld compile a gallery of some of the best 3D environments for Warhammer by Blur Studios and environmental pics by KDLAB.

ZBrush is the hybrid tool for the hybrid artist. © 2004 Pixologic, Inc. All rights reserved, Pixologic and the Pixologic logo, ZBrush, and the ZBrush logo are registered trademarks of Pixologic Inc.
On the forums, at schools, in art departments, everyones talking about ZBrush 2.0. Its enough to get the sense that we are in the Star Trek: The Next Generation episode The Game and Data will show up just in time to rescue us all from our new addiction. Everyones doing it, wanna try?
Recently the Gnomon School of Visual Effects started the very first ZBrush class and has been overwhelmed by the response. Award-winning artist Meats Meier, who is teaching the class as well as working on five ZBrush DVDs for the Gnomon Workshop, says, We are overwhelmed by the interest in our ZBrush classes, many film and video game studios are now adopting the package and are scrambling to learn and integrate this new technology.
ZBrush, like many emerging artists today that use it, is a hybrid. It doesnt fit into any one area of production. You could call it a modeling package. You could call it a 3D texturing package. You could call it a 2D paint package. And you would be right every time.
The first thing to understand about ZBrush is that it uses Pixols. A Pixol is similar to a pixel, except that while a pixel contains RGB information as well as XY coordinates, a Pixol contains RGB, XYZ, rotation, material and lighting information. I can hear those words whiz right past people as they read them: RBG, XYZ, rotation, material and lighting information amongst other things. That means that ZBrush has taken pixels as we think of them in Photoshop and added components that we traditionally link to 3D packages: materials, rotation and lighting.
Another way to think about it is this. Take Photoshop and add the hypershade, perspective camera, lights, mel and blend shapes from Maya, add a few naturalistic brushes from painter, add some very awesome procedural modeling and deformation tools and you have something close to ZBrush.
The second thing to understand is what they call tools. Coming from a 3D background we are used to calling our 3D objects, well, objects. In ZBrush an object is a tool. A tool can be either a 3D object or a brush used to modify a 3D object. Calling it a tool takes a little getting use to, but in ZBrush, 3D objects are tools we use to create Pixols. While 3D objects are our common bond with other 3D packages and are all the rage for ZBrush right now, thanks in no small part to the work of artists such as David Cardwell and the success of The Lord of the Rings trilogy, at its heart ZBrush is all about the Pixol. And it is a stubborn heart.
ZBrush is a 2.5D program that has taken what it needs from 3D programs. It seeks to collapse the rift between idea and technique. To that end it does not offer as many bells and whistles as a 3D program but it is not as complicated and obfuscating as one either. It has a lightning fast renderer and outputs to Photoshop files, bitmaps or tiffs. It seeks to be a program where people express what is in their minds, not in their instruction manuals, where artists create gory orcs or whatever else they want and dont worry about edge loops or other such more technical considerations.
To this end, ZBrush 2.0 automates many of the tasks that CG artists are use to doing for themselves and, quite frankly, that takes some getting use to. We are not used to being catered to. You need something done in Maya? Well, write a script! I even feel like I am cheating when I just press a button to, say, store a morph target. I keep looking around for the option box.
To be more specific, modeling in Maya forces the modeler to think of the flow of a models surface as he is thinking of the forms themselves, which can be distracting and time consuming. The equivalent feat for a sculptor would be to make her think of both the final mold and the sculpture at the same time. That is no way to create art.
Sculptors break these two very different tasks into two very different jobs and that is not a bad thing. Particularly when you can get an apprentice to do the grunt work! That is not to say that I cannot control edge loops in ZBrush 2.0 if I want to. ZBrush 2.0 gives me plenty of options for that, but having ZBrush deal with the topology of a model gets me closer to a realtime sense of interaction than any 3D package out there today can. Sculpting almost feels real.
That is the power of ZBrush 2.0. It gets the artist closer to the act of creation: an act that we have separated ourselves from by wires and microchips and insane math and complicated procedures and segregated departments.

Organic modeler Ryan Kingslien finds that ZBrush 2.0s multi-resolution mesh editing gives the sensation of really sculpting the surface of a model. Courtesy of Ryan Kingslien.
The most powerful weapon in ZBrushs arsenal is its modeling tools and the most important aspect of modeling in ZBrush is the ability to model at various levels of resolution and have those changes propagate both up and down the hierarchy of the model. This is called multi-resolution mesh editing.
Recently, I created a full set of morph targets for a cartoony character in one day. Seventeen base shapes. That is opposed to maybe six a day within Maya. That is a gigantic leap forward in productivity and allowed me to add more shapes onto my previous bid without altering the price for the client. This was solely the result of the power of multi-resolution mesh editing.
Multi-resolution mesh editing separates out the different levels of form changes for us. For major form changes, such as the shape of the jaw, you use lower levels of resolution. For smaller form changes, such as the corners of the mouth, you use a higher level of resolution. This means that as a modeler we do not need to be worrying about how our fine details are following along when we go from a closed neutral expression to an open happy expression. By separating out these levels of form changes, our modeling is more efficient and faster.
Another important modeling tool in ZBrush is ZSpheres. ZSpheres are basically metaballs on steroids and with joints, uh, bones that is. They are amazingly fast for blocking in figures or props. But their use does not end there. Once they are skinned, Pixologics term for converted to a 3D object, they can be modeled. It is even possible to model them while they are still ZSpheres, which is particularly useful because you can switch out the heads of models or use default hands and feet by using the Insert Mesh tool. You can even use the ZSpheres to pose your figure, which I find particularly amazing because it acts as a simple skinning solution in the 3D sense of the word.

Kingslien uses ZBrush 2.0's ZSpheres as a fast way to rough out and pose organic models that are then detailed. Courtesy of Ryan Kingslien.
ZSpheres also have attractor spheres, which let you pull the geometry in other directions as well as create edge loops. ZSpheres will, I believe, become a part of every modelers toolbox. For concept design alone they hold a lot of promise and with the advent of 3D printing and rapid prototyping digital sculpture is rapidly becoming a reality.
Pixologic has also just released a sneak peek at the future of ZSpheres, which promises to revolutionize the already revolutionary Zsphere. In the next release you will be able to remesh your models entirely within ZBrush. Thats right. ZBrush will have its own equivalent of the topology brush. It would be amazing if it stopped there but Pixologic is adding features at a rate that would make Dell jealous. ZSpheres will also be able to be added to any mesh as a rigging and skinning solution in what Pixologic is calling a Modeling-Rig.
Modeling rigs operate as a volume-rig or a surface rig. While volume-rigs can be used to pose a model in the way joints are used in 3D programs, surface-rigs lie on the surface of the model and can be used to facilitate blendshape creation and surface tweaks in a way similar to how joints and clusters are used in a facial rig.
On another note, the morph tools for ZBrush 2.0 are simple yet extremely powerful. You can finesse your morph targets by painting the morphs into a base shape giving you complete control over the falloff of the form changes. While studios such as Digital Domain have their own software for this kind of thing, it is not currently an easy option to implement in Maya or for a user without a team of programmers at their disposal. In ZBrush, it is a matter of a few mouse clicks.
Another method, which fine artist Meier has been using to create his unique wire style sculpture, is the ability to Create Difference Mesh from your morph target. This creates a mesh that is the difference between the stored morph target and the deformed object.

Award-winning artist Meats Meier's unique wire style has become one of his signature forms of sculpture. Courtesy of Meats Meier.
Pivotal to ZBrush are its use of alphas. Alphas form the bridge between the painting side of ZBrush and the sculpting side of it. Alphas can be used as masks in the same way that an illustrator uses masks or as a stencil through which you can paint in your deformations or applied to a surface in the same way displacement maps are applied in 3D packages.
ZBrush has the ability to take a 2D grayscale image such as an alpha map and give it depth. A digital elevation map, DEM, which is basically a grayscale image where value equals height, can be downloaded from the Internet and used as an alpha to create a 3D terrain. Graphical text can be rapidly turned into 3D and 2D graphical images of gears can be used to model, you guessed it, gears.
While ZBrush is most visibly a modeling program, modeling is only a part of what ZBrush can do. As a 3D texture painting package, ZBrush combines the use of 3D objects with texture painting allowing you to utilize any of its 3D tools to create 2D textures. It now supports 16-bit images and has added cool new brushes like the Deco brush that stretches a texture along the path of the brush and is very useful for painting in wrinkles and other such details. High frequency details that you paint onto the model can then be exported out as displacement maps.
Painting in ZBrush has a unique reality. Pixols interact with each other so painting on top of another pixol does not necessarily give you the same result as painting on nothing. This gives a level of realism to painting that is very unique to ZBrush and resembles Painters ability to mimic traditional materials. You can also paint at different depths and adjust your very last brush stroke.

Pipeline guru Jason Belec has been adapting 2.5D techniques used widely in matte painting for ZBrush 2.0. Courtesy of Jason Belec.
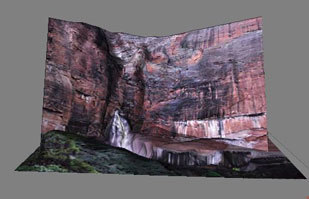
Of particular note for production is the use of ZBrush as a matte painting tool. Pipeline guru Jason Belec has been exploring the use of ZBrush to create 3D camera projection mattes. Belec notes that currently we can get a 3° angle of rotation in mattes. With ZBrush, he is able to get a 10° angle of rotation. Not to mention you are sculpting and painting your mattes in the same program and not going back and forth between two separate programs.
At the center of ZBrush 2.0s texture painting is the Projection Master or PM, as its known. The Projection Master is an extension of the Texture Master of previous versions and the name says it all. It allows you to use ZBrushs tools to either texture or deform the surface of your 3D object by projecting your strokes onto the object in a similar way to Body Paints projection mode. Within Projection Master, you can texture paint your model, model fine details like wrinkles, or paint different materials onto an object such as, say, paint metal screws onto a piece of wood, for example.
ZBrushs materials, while they do not necessarily mirror other 3D programs, do give you great results fast. Their subsurface scattering shaders are very realistic. Also, while the ability to bake out materials is not available yet when it is it will be a very powerful feature that realtime gamers can use to make cool baked textures fast.

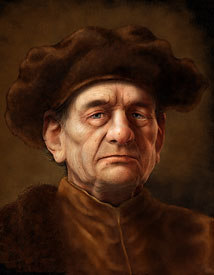
Award-winning artist Krishnamurti Martins Costa shows how texturing in ZBrush 2.0 can be used to create a very painterly style. © Krishnamurti Martins Costa.
Another often-unseen side of ZBrush is its use as an illustration program next to Photoshop and Painter for 2D graphics work. The 3D tools are very useful for rapidly creating forms and its 2D tools such as the blur brush or the snake hook brush let you work with images in unique ways. The work of acclaimed Japanese illustrator Hiroshi Yoshii is an excellent example of using ZBrush as an illustration tool. The work of Shikuri on the other hand shows its use for large-scale gallery work.
ZBrush seems poised for an incredible future. What we have looked at in ZBrush is really only the tip of the iceberg of what ZBrush is and can do. Ofer Alon, Meier, Cardwell, Southern Glenn, Taron Timur, Krishnamurti Martins Costa, Strike and many others deserve an immense credit for showing us what can be done with this unique program.
Pixologic has an innovative idea in the concept of the Pixol and a willingness to adapt their program to the needs of its users. With the recent addition of a scripting language and the ability to write plug-ins for ZBrush, there is no way to tell where this story will end. Come on, everyones doing it.
Ryan Kingslien is a classically trained digital sculptor working as a freelance modeler in Los Angeles, California, in film and broadcast media. He can usually be found glued to his computer sculpting in ZBrush convinced that he has finally solved the worlds problems.


